
Official plugins
Forms — contact us, newsletter sign-up, quote requests
The official Forms plugin — build forms with 10 field types, place them with the designer, receive messages in an inbox, export CSV, email notifications, webhooks and spam protection
On this page
The Forms plugin (forms) lets you build forms in the admin, place them on any page and keep every message visitors send on your own site.
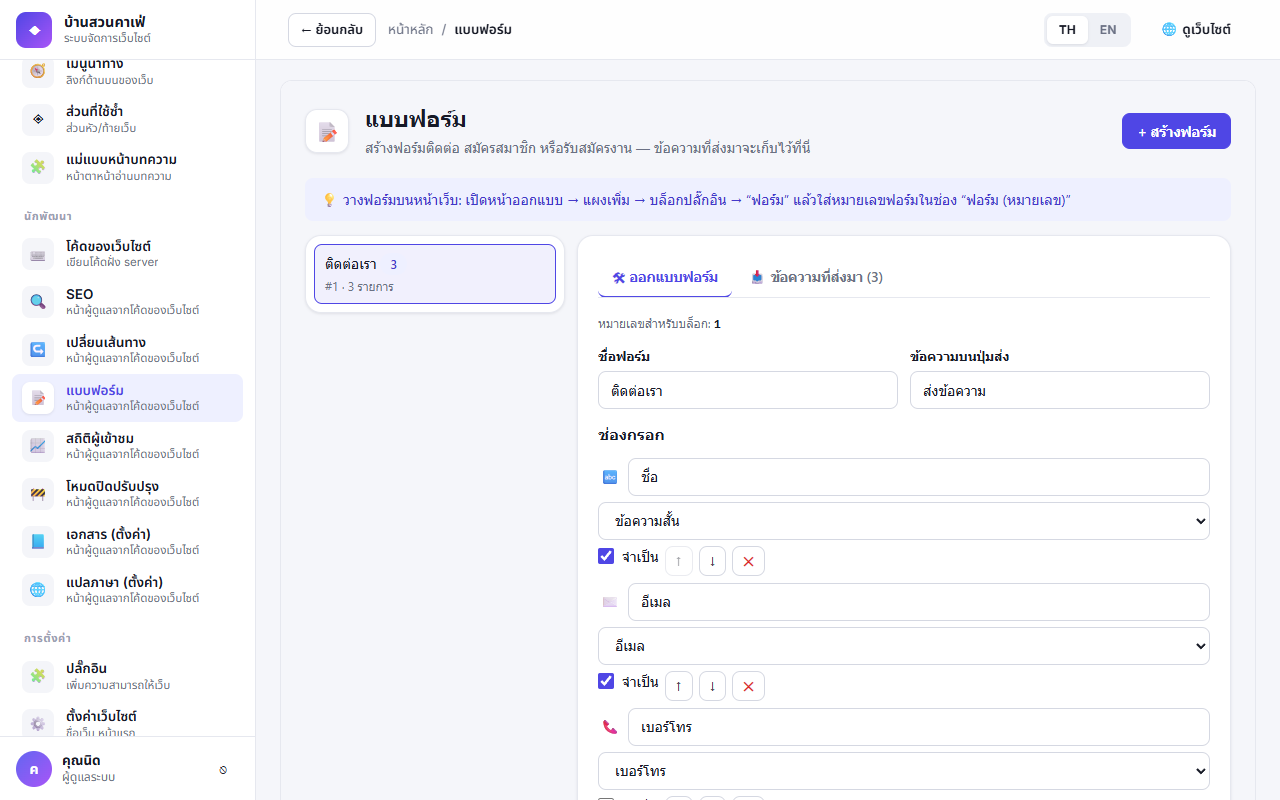
Building a form#
- Left menu Forms → New form
- Set the name and the button text, and add fields — 10 types: short text, email, phone, long text, choice (dropdown), single choice, checkbox, multiple choice, number, date. Each field can be required and fields can be reordered
- Enter a thank-you message shown after sending, or choose a page to go to after sending (pages on this site only)
- To send the data to another system, enter this form's Webhook URL (the system POSTs JSON for every new message)
Advanced forms (2.1)#
- Single choice / multiple choice — options separated by
,; multiple choice stores the answer asKitchen, Garden - Show when (from the second field on) — show a field only when an earlier field has a given value, e.g. "Company name" shows when "Type" =
Office. An empty value = show when that field has any value. Hidden fields are not required and not stored (checked on the server too) - Auto-reply email — enter a subject and message; the system sends it to the address in the form's first email field right after sending (empty subject = not sent)
File uploads (2.2)#
A File upload field takes images, PDF, Word, Excel, PowerPoint, text or ZIP files up to 4 MB each (checked by name and content) — for job applications (CVs) or photos. Files are private (no public link), downloaded from the 📎 button in the submissions, and deleted with the submission or the form.
Sent from — a form placed on a post's page (a listing template, an event page) records that page's title and address with each message: the Sent from column, the notification mail and the CSV show it — one "I'm interested" form for every listing.
Placing a form on a page#
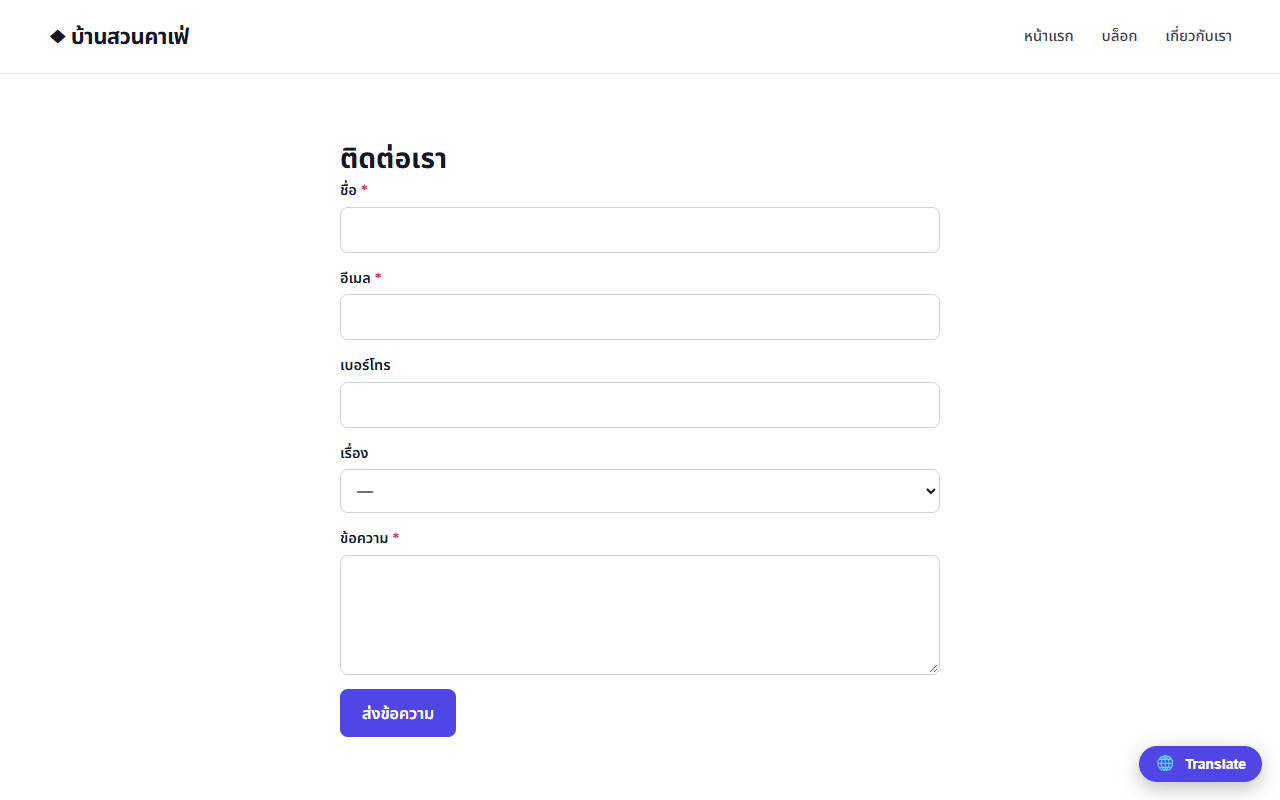
In the designer: Elements → Plugin blocks → Form, drag it where you want it, then pick the form in the panel on the right.
Forms are rendered on the server, so they work with JavaScript off and Google can read them — with JavaScript on they send without reloading the page. Every form also has its own page at /forms/<id>.
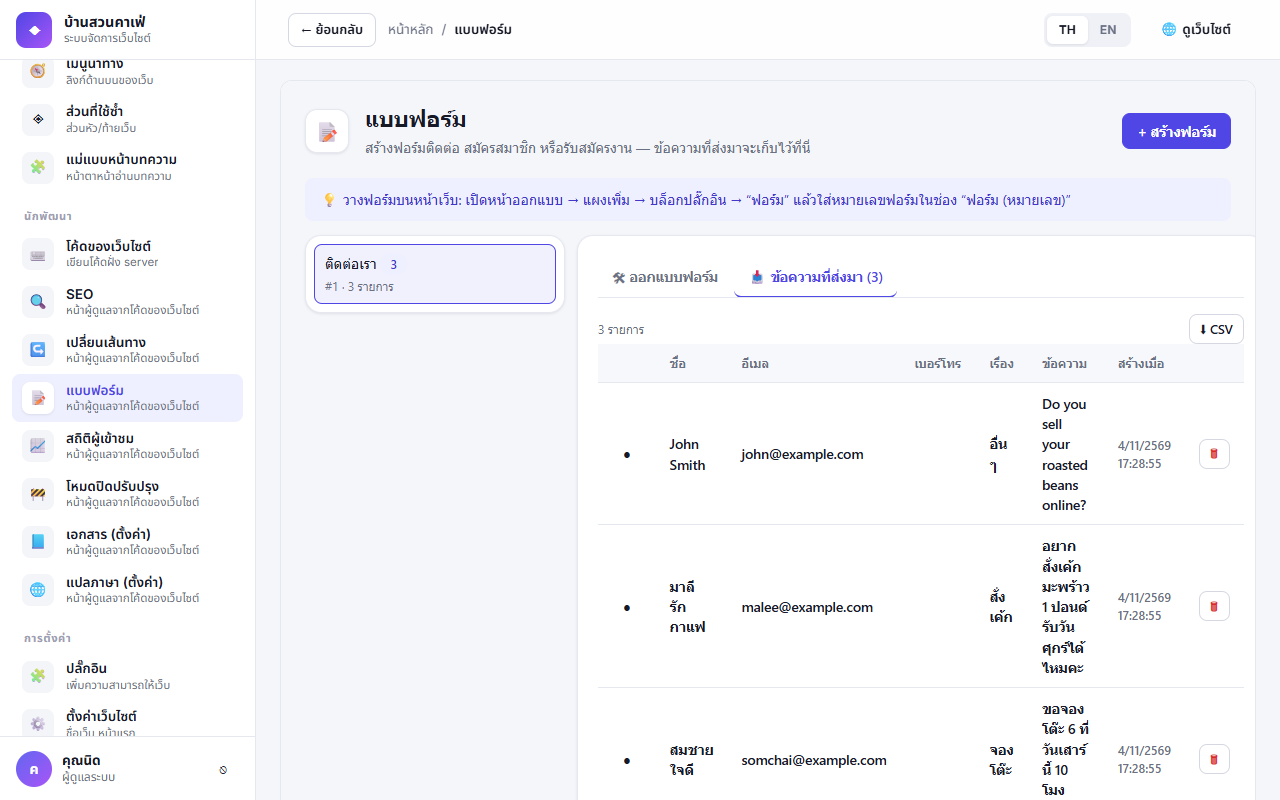
Reading the messages#
Open the form on the Forms page → the Inbox tab — new messages are in bold. Press one to read it, mark it unread or delete it, and press CSV to export for Excel/Google Sheets (UTF-8, so Thai text stays intact).
Email notifications and webhooks#
The system emails a notification for every new message (reply goes straight to the sender) — set up Site settings → Email first.
| Setting (Plugins → Forms → Settings) | Meaning |
|---|---|
| Notification email | Empty = the administrator email |
| Site name in emails | The name shown in the email subject |
| Webhook URL | POST JSON for every form (in addition to per-form webhooks) |
Spam protection#
- A hidden decoy field — bots that fill it in are told it worked, but nothing is stored
- At most 5 sends per minute per IP
Permissions#
| Permission | Meaning | Default |
|---|---|---|
forms.manage | Create, edit and delete forms | Administrator, Editor |
forms.view_submissions | Read messages and export CSV | Administrator, Editor |
Developers can listen for the form.submitted event in Site Code — see Hooks, content types and background jobs.