
Selling
Selling (POS)
Pick the till, open a shift, sell by button or scanner, choose the customer, discounts, hold a bill, take cash, QR, transfer, card or split payments, print the receipt, close the shift, and keep selling offline
On this page
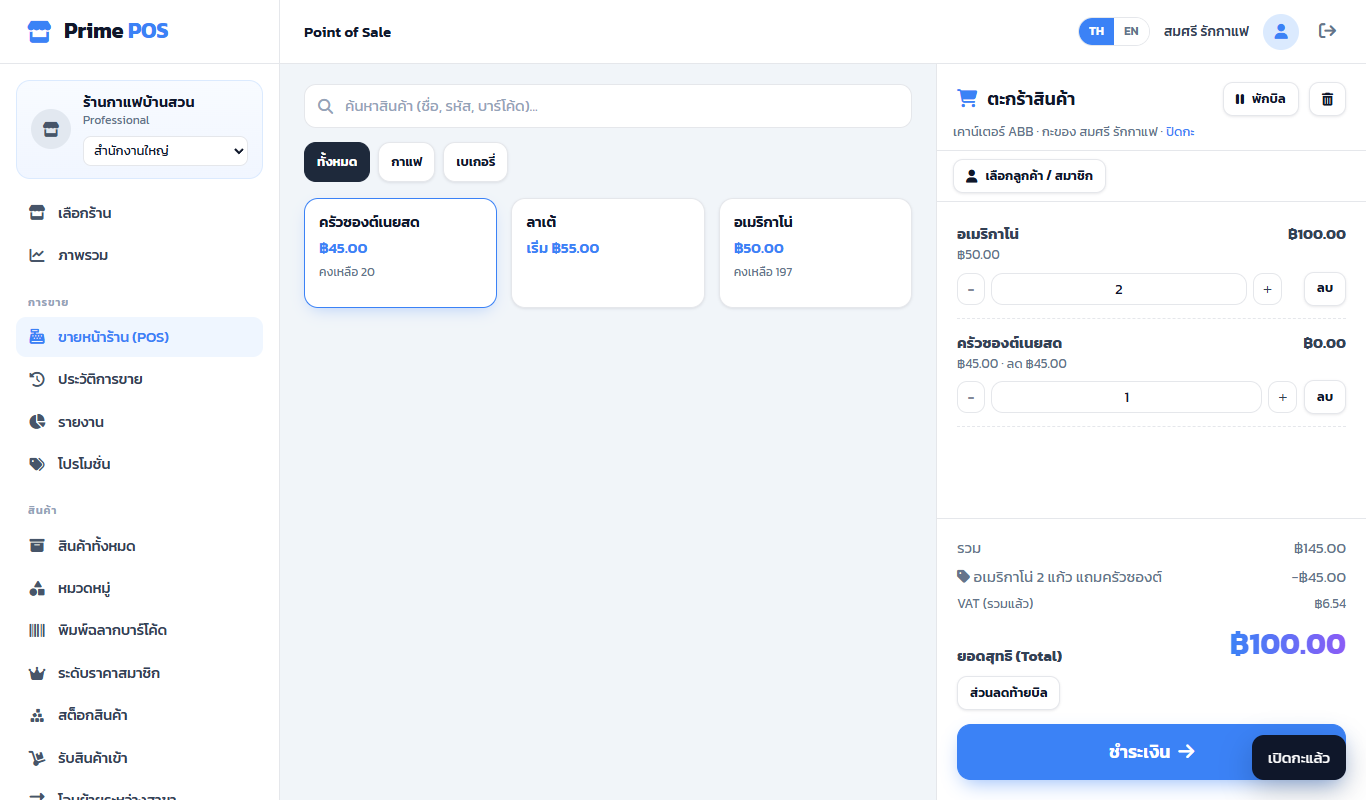
POS Terminal — products on the left (search and category tabs), the cart on the right.
Pick the till#
If the shop has tills (see Staff, roles, branches and tills), the first time a device opens the selling screen it asks Which till is this device? Choose once; the device remembers. Each till has its own shift and cash drawer.
Open a shift#
Enter the starting cash and press Start shift (Later lets you look around first — the cart header then has an Open shift link).
Sell#
- Tap a product, type a name or code in the search box, or scan a barcode — it goes into the cart.
- Products with options open a window to choose one.
- Change quantities with − / + or type; Remove takes a line out.
- Prices, promotions and VAT are worked out on the server every time, so the cart always equals the bill.
Customers and points#
Choose customer / member — search by name or phone (or add a new one). The cart then shows:
- Member discount for the customer's level
- Birthday discount or birthday points if the shop turned the birthday treat on (see Customers, points and birthdays)
- Use points to turn points into a discount, and the points this bill earns
Bill discount#
Bill discount under the total (roles with Void bills / bill discount only).
Hold a bill#
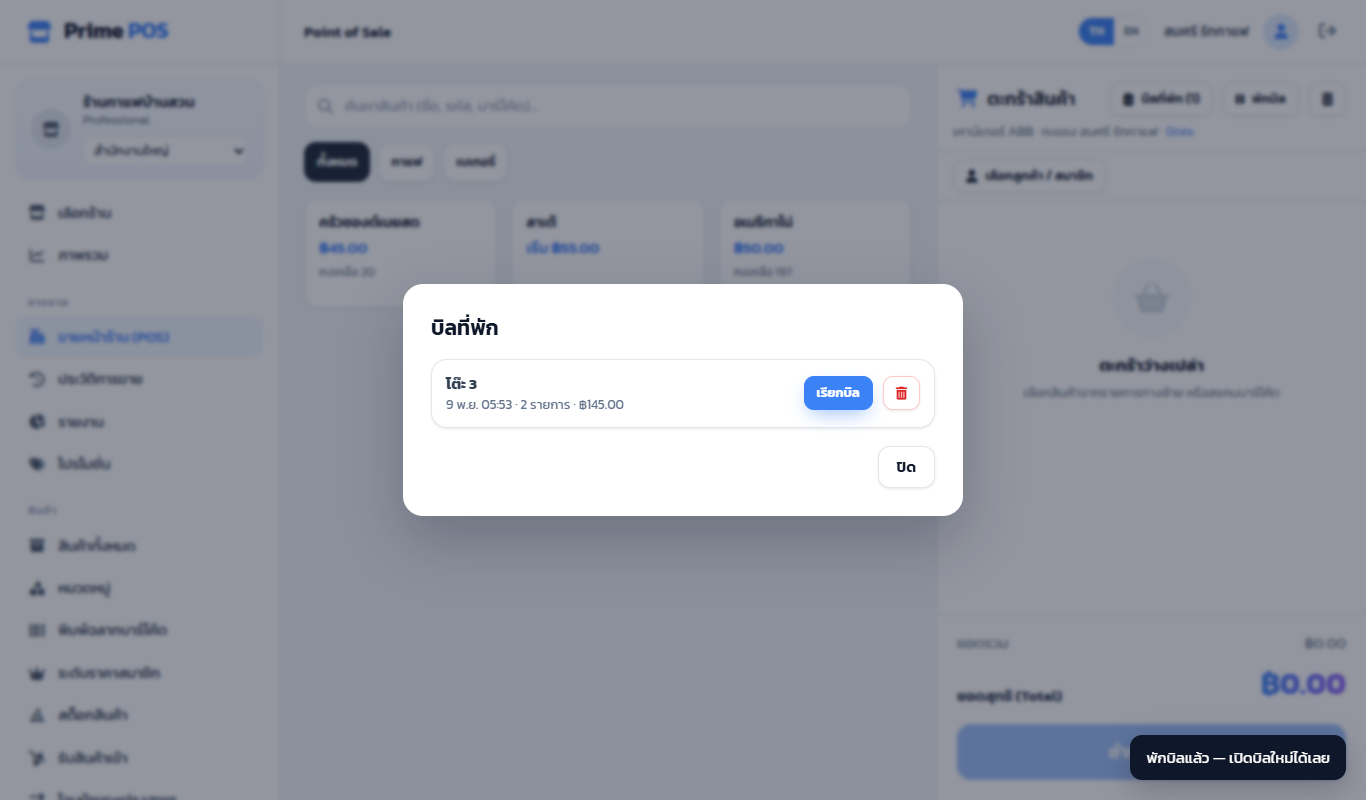
A customer is still choosing while someone waits to pay — press Hold bill, optionally name it ("Table 3"), and serve the next one.
Held bills (n) in the cart header lists them; Recall brings one back (an open bill is held in its place) or the bin discards it.
Held bills stay on the device that held them (they survive a reload); other devices do not see them.
Arrange the till#
- Full-screen till hides the side menu and the tools at the top, leaving the seller's name and the PIN switch (on by itself for staff who only sell). Leave the till screen takes the owner's or a manager's PIN (a shop where nobody has set a PIN leaves at once — set one under My account, top right).
- Grid / list switches the product buttons (grid for tablets, list for phones).
- Favourites: the shop's best sellers — press Arrange favourites, tap products to add or remove, drag to reorder.
- A product without a picture can have a tile colour (on its edit page).
Payment#
Press Checkout and choose:
| Method | How |
|---|---|
| Cash | Enter what you received (quick buttons); the change is shown |
| QR | A PromptPay QR for the exact amount (set PromptPay in Shop settings → Payment methods) |
| Transfer | Shows the shop's bank accounts |
| Card | Swipe on your card terminal, then confirm |
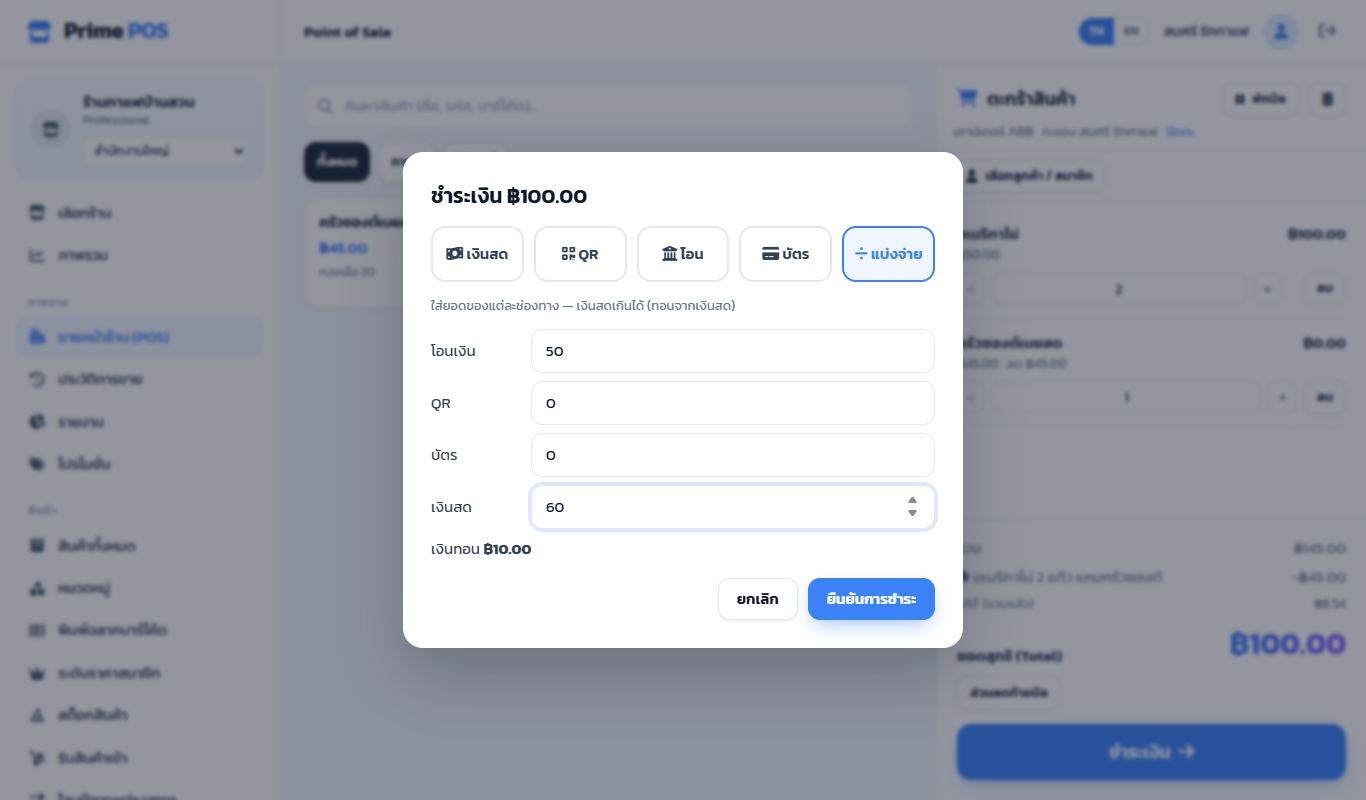
| Split payment | Amounts per method, e.g. transfer 100 + cash 50; cash may be more — the change comes from the cash |
Confirm payment shows Sale complete with the bill number and change, Print receipt and E-mail receipt, then Next sale.
Close the shift#
Close shift in the cart header shows the shift's sales and the cash that should be in the drawer; enter what you counted and close. The difference (short / over) is kept — see Sales shifts on the Order History page.
Selling while offline#
If the connection drops an Offline bar appears. Keep selling at list prices (no promotions yet), by cash, transfer or card. Bills wait in the device's queue and are sent when you are back online — never twice.
Receipt printers#
Shop settings → Devices (per device):
- The browser's print window — any printer.
- Direct printing to a thermal printer (USB / Serial) — prints at once and can open the cash drawer on cash sales; Chrome / Edge on a computer.
Paper size (58 / 80 mm), copies, logo and the receipt footer are in Shop settings.